
How do I deploy a Node.js application manually?
Two methods: from a Git repository with Hodifly, or by hand in cPanel.
Recommended: deploy with Hodifly
Hodifly deploys your Node.js application from GitHub or GitLab on every git push. It creates the Passenger application, installs the dependencies and puts the new release live: there is nothing to configure in cPanel.
- Automatic detection: Hodifly recognises your framework and pre-fills the build command and output folder (including Express, Fastify, NestJS, Next).js, Nuxt, Astro, SvelteKit and Remix.
- Startup file:
server.jsby default, changeable in the project settings. It must listen onprocess.env.PORT. - Dependencies: installed from your lockfile (npm, yarn, pnpm or bun), frozen for reproducibility.
- Immutable releases: the last 5 deploys are kept, and rolling back is instant with no rebuild.
- Environment variables, encrypted, passed to both the build and the running application.
Open cPanel > Hodifly, connect your repository, pick the branch and domain, then deploy. Full details in What can I deploy on Hodifly?.
Manual: "Setup Node.js App" in cPanel
What's the difference between "Setup Node.JS App" and the ".bashrc" method?
- "Setup Node.JS App": This tool is only for setting up a Node.JS application accessible over the web (such as an API or an Express.js site). It automatically sets up an environment and manages the web server's execution.
- The ".bashrc" method: It gives you full control over Node.JS. You can run any Node.JS script, whether it's a cron job, a command-line tool, or a build script. See the dedicated FAQ on this topic.
How do I deploy my Node.JS web app with "Setup Node.JS App"?
We let you deploy a Node.JS application directly on your hosting account, without needing to worry about supervising your node process. Technically, deployment is based on Phusion Passenger (further down this page you'll find more technical information on how it works).
Also, feel free to check out the list of frequently asked questions about Node.JS.
- Log in to your cPanel
- In the "Software" section, choose "Setup Node.JS App"
- Click " Create Application"
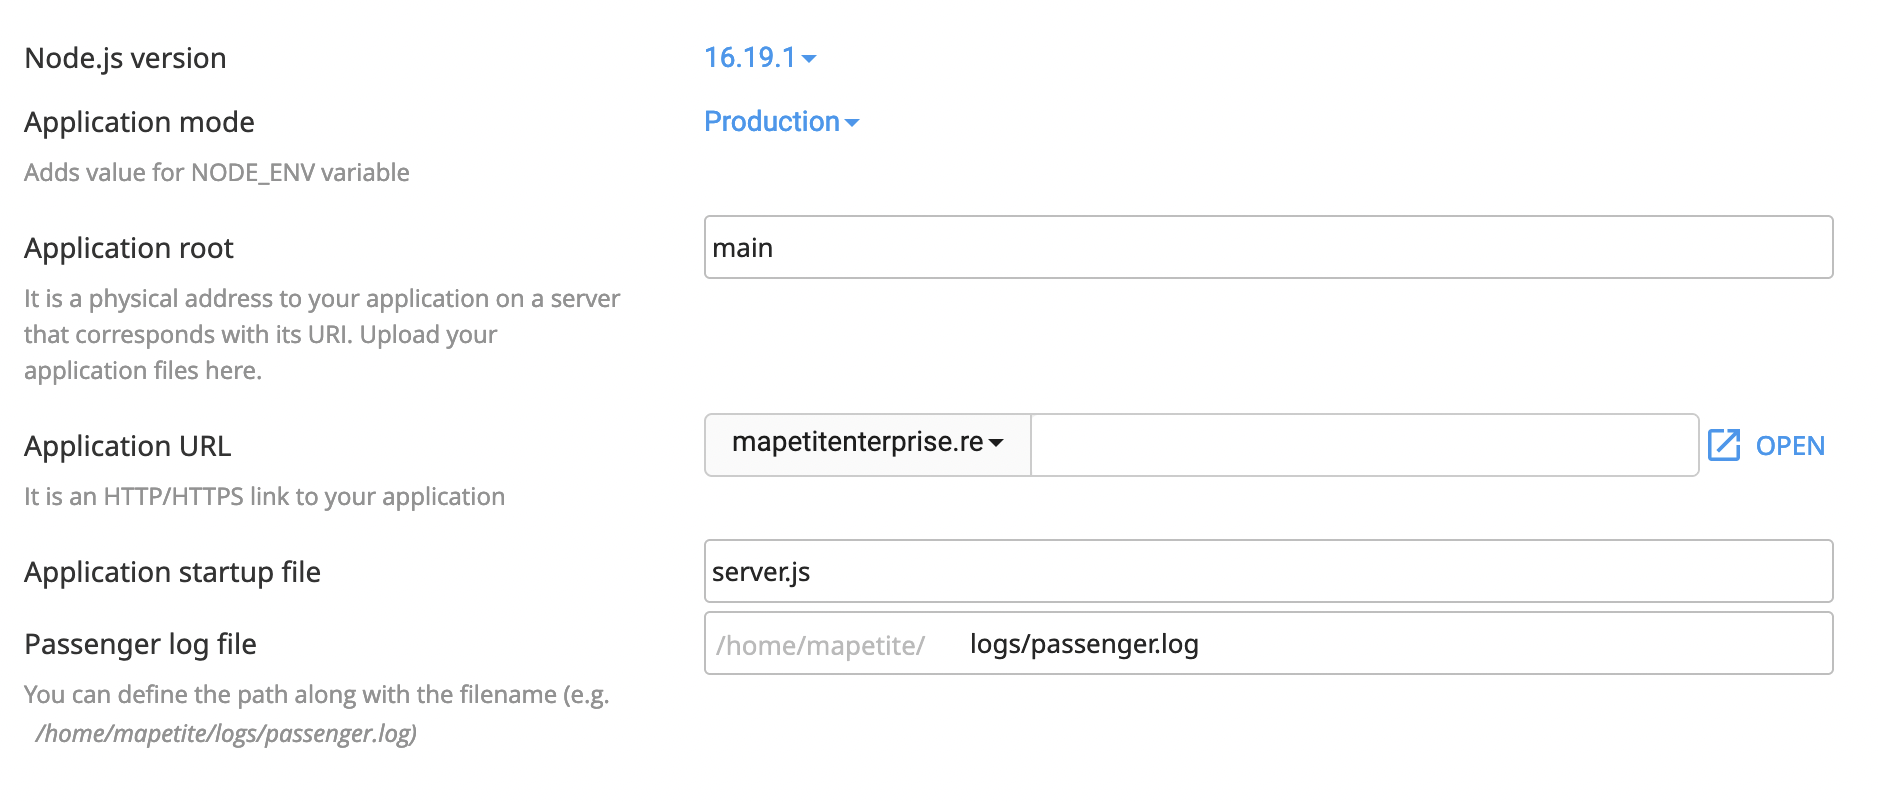
- Fill in your application's details:
Create: click here once you've filled in the form to create your application
Node.js version: choose the Node.JS version to use (if the version you want is missing, don't worry, our technical support will install it for you)Application mode: choose between development and production mode, this sets theNODE_ENVenvironment variable.Application root: specify the folder where your application's code is located (preferably use a folder other than the one for the domain where you're going to deploy your application)Application URL: specify the URL where you want to deploy your application, the directory after the domain name is optional (cPanel will create a .htaccess file there)Application startup file: specify the name of the JavaScript file used to start your application, it must be present in theApplication Rootfolder (this is usuallyserver.js)Passenger log file: specify where you want to create the log file (optional but useful for debugging)Environment variables - Add Variable: add the environment variables required by your application
- Even though you can install dependencies via cPanel, we recommend doing it over SSH to better see any errors if they occur.
- To do this, log in via SSH, copy the line shown at the top of your application's page in cPanel, and run it once you're connected via SSH:

- You can then run
npm installoryarn install. - If you get a "
RangeError: WebAssembly.instantiate(): Out of memory: wasm memory" error, try connecting via SSH instead of using the cPanel Terminal app, as the latter doesn't allocate enough memory for these commands.
How does this work technically?
Phusion Passenger works differently from what you might be used to (e.g. node server.js), and you didn't need to specify a listening port for your application. In fact, Phusion Passenger handles all of that transparently; it's the Setup Node.JS App tool that starts your application, and restarts it if it stops unexpectedly.
For this reason, you must not start your application manually, as it would then listen on port 3000 (for example), which isn't accessible from outside (blocked by our firewall).
Phusion Passenger starts your application, and as soon as it encounters the listen() instruction, it connects a Unix socket to it (instead of the specified port) and links it to the web server via this Unix socket. This is known as reverse-port binding.
Updated on: 15/08/2026
Thank you!